
How to Create Stems in Logic Pro
A Guide for Home Producers

Stems vs Multi-tracks
If you're sending your music to a mixing engineer, you'll often be asked for either stems or a multitrack. They're not the same thing but people do use the term stems for everything so it’s important to find out exactly what you need.
A multitrack is every individual track exported separately e.g. kick, snare, hi-hat, bass DI, bass amp, guitar left, guitar right, lead vocal, backing vocal 1, backing vocal 2 and so on. It gives an engineer complete control over every element.
Stems are grouped exports e.g. drums as one stereo file, bass as one stereo file, guitars as one stereo file, vocals as one stereo file. They're great for creating back up files and committing to elements of the mix you love.
Which one you need depends on who you're sending to and why. If you're not sure, ask. Most engineers will tell you exactly what they want. If you'd rather skip this step entirely and send me your session directly, you can find out more about my mixing service here.
A Few Things to Check Before You Export
Make sure your project is in good shape before you start bouncing stems. Check that:
There's a bar or two of silence at the beginning of your session
All your tracks are properly labelled
You're happy with any editing, tuning and timing fixes as stems lock those decisions in
Your master fader is at 0dB — don't print limiting or heavy master bus processing into your stems unless you've discussed this with your engineer
Step 1: Set Your Cycle Range
The cycle range tells Logic exactly what to export.
Hit ‘C’ on your keyboard to turn on cycle mode, then drag across the ruler at the top of the arrange window to cover the full length of your song.
Make sure you start from bar 1 and extend slightly past the natural end of the song to capture any reverb or delay tails, I normally do this at a high volume so i don’t accidentally cut anything off.
Step 2: Group Your Tracks USING TRACK STACKS
Before selecting anything, take a moment to organise your session into stem groups.
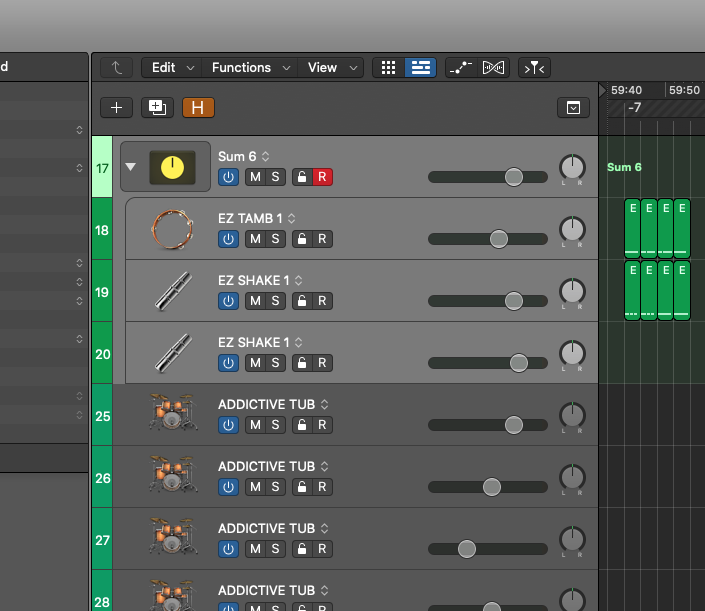
To do this I use track stacks which you can create by selecting all desired tracks and right clicking and selecting ‘create track stack’ or by using the keyboard shortcut ‘shift command D’.
You will be given the option to create either a ‘Folder Stack’ or a ‘Summing Stack’ select ‘Summing Stack’.
Logic will then automatically route the selected tracks into a track stack channel called ‘Sum…’ relabel this whatever you want your group stem to be called.
A typical setup might look like:
Drums: kick, snare, toms, overheads, room mics
Bass: DI, amp, any parallel tracks
Guitars: rhythm, lead, any layers (sometimes it’s worth breaking this up into rhythm and lead)
Keys / Synths: pads, leads, arpeggios
Vocals: lead, doubles,
Backing Vocals: harmonies, ad-libs, textural backing vocals
FX / Other: samples, loops, risers, anything that doesn't fit above
This grouping is what becomes your stems. Each group gets bounced down to a single stereo file.
Step 3: EXPORTING THE STEMS
Click the first group track on your arrange page then hold Command and click each grouped track (track stack) you want to export individually.
With your tracks selected, go to:
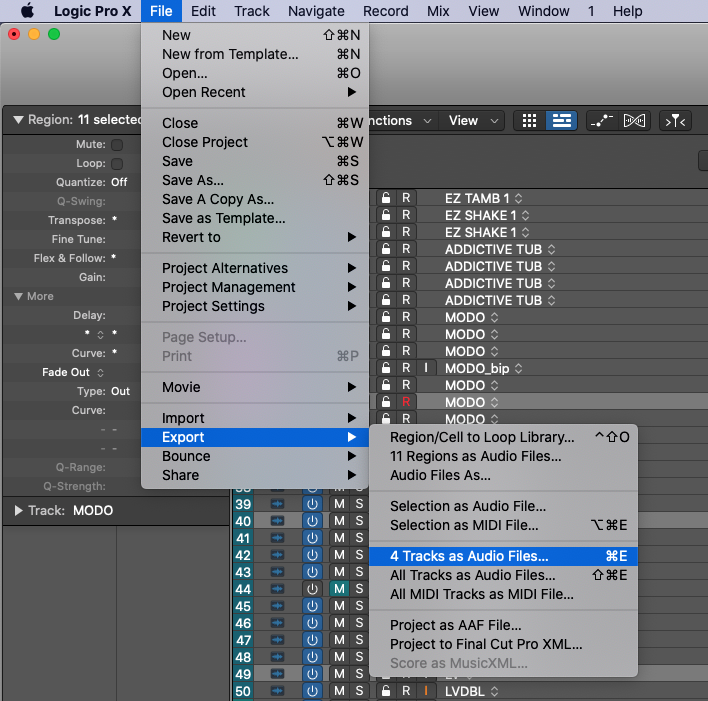
File → Export → (_) Tracks as Audio Files or use the keyboard shortcut ‘Command E’
In the dialogue box that appears:
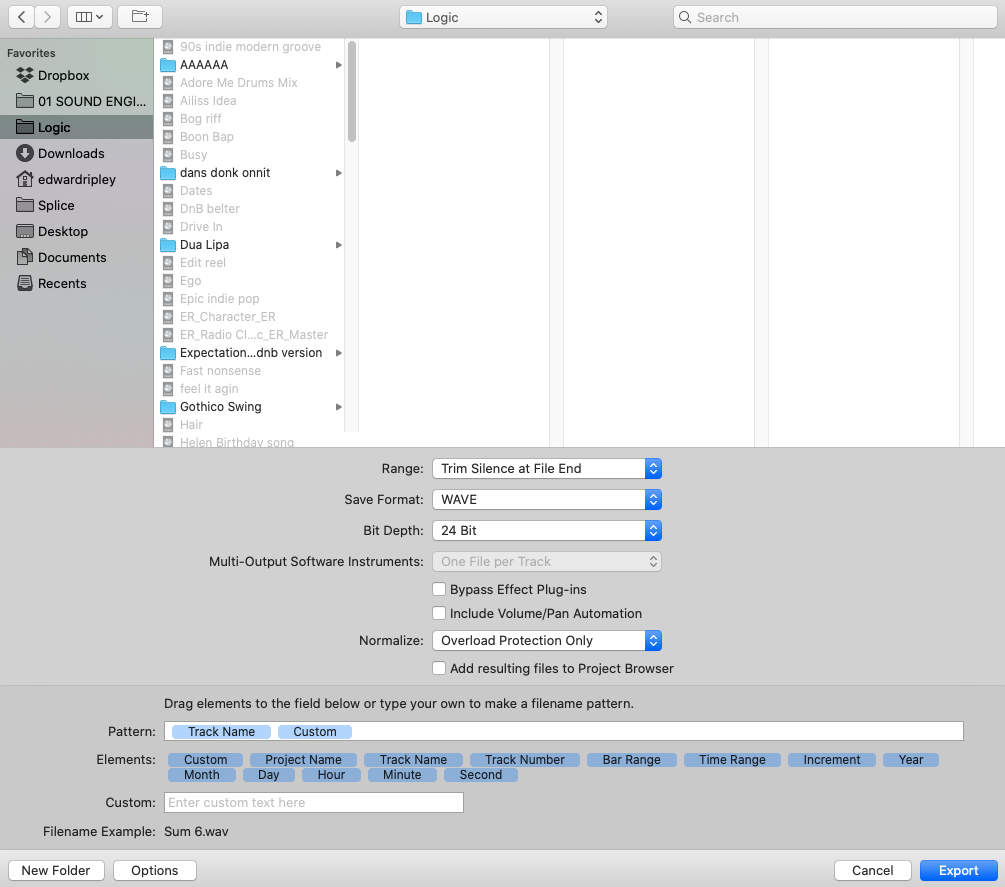
Set Range to Cycle Length
File format WAVE
Bit depth 24bit (or higher if you are working at 32bit float)
Select include Volume/Pan Automation (this commits to your mix decisions)
Under ‘pattern’ add ‘custom’ and type in ‘_Group Stem_Track Name’ this will auto name all your stems for you so they don’t get lost.
Hit Export and Logic will render the files into your selected destination folder.
Step 7: Check Your Stems Before Sending
Either in your existing session or a new empty Logic project, import all your stems and play them back together. If it sounds like your mix, you're good. If something is missing or wrong, go back and find the problem before you send anything.
Pop your files into a folder and right click and select ‘Compress’ so finder can reduce the file size and they’re ready to send or back up!
Ready to put this into practice?
Reading about mixing only gets you so far; a Mix & Learn Day means working through your actual track with someone who can hear it. Spend a day in the studio and leave with a finished mix and the skills to do it again yourself.
Prefer to hand your track over entirely? Mixing and Mastering services are also available.


Ready to get started?
Fill out the form and tell me about your project!